The M.A.M.E. Cabinet - 'INSERTED COINS' - Part 4
PART 4:
CONDENSED MILK
Okay, not condensed milk. More, er, condensed information.CONDENSED MILK
First I'll address the things that I said needed fixing in part 3...and whether or not I've done anything about them... :)
"1. The cabinet holds a LOT of heat. I plan to drill some holes in the top of the cabinet to try and vent the heat a little better and perhaps install a fan…OR I could cook hot dogs in there."
Well, I'm planning on installing a fan in/on the interior of the cabinet to keep the temperature down. I had one, was going to install it...and it didn't work - right out of the box. SO, as soon as I get a functional one, this will be done.
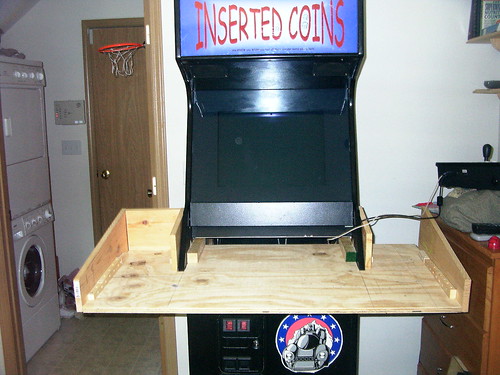
"2. Need to install the power/reset buttons in a more effective place. Currently, I’ve got the jumpers for both power and reset hooked up to buttons which are locked in the coin box. This keeps the kids from being able to mess with the device if I don’t want them to…but it also means I have to remember where I put the keys…"In the end, I decided to be done with the locking away of the power function on the machine from my kids. It's now situated in the top, middle part of the control panel. I've set it up to be a single button solution. Basically, you push the one button, the PC inside comes on, the monitor turns on, the sound turns on, and so on. Once it's been up and running long enough for you to have had your fun, the same button will turn everything off, nice and tidy. :)
"3. Need to remove the motherboard, drive, etc from it’s current case and mount in a more convienient location. Right now, if I want to do any work on the box I have to physically remove as there is no front access AT ALL."
Haven't even addressed this one yet. I'm thinkin' bout' it though.
"4. Hook up some wacky network access. If I want/need to mess with the operating system, M.A.M.E., or anything, just like the hardware issue mentioned in point 3, I have to take out the box. I need to install some VLC action on there to make that easier."
The box is now networked, (via ethernet over powerline), and runs RealVNC. Not VLC. I was confused about my acronyms the day I wrote that stuff. Remote controlling the box amuses my kids endlessly. :)
"5. ‘Mamewah’ documentation/experimentation. There are a lot of people on the web that sing the praises of this ‘M.A.M.E.’ front end. I found the documentation to be lacking. With a little work, I got it figured out but there are still some things I HAVEN’T figured out yet. I’ll eventually get there. I’ve found some quirks that could just be machine specific, of course…but I just need to do some digging."
Someone else decided to really dig in on this. As a result...I don't have to!!! You can find this information here:
Mamewah WIKI
"Future plans…"
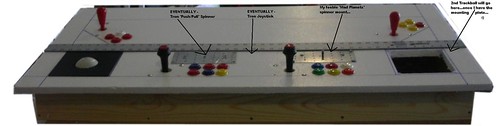
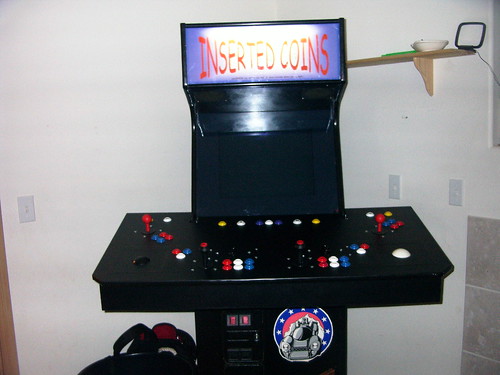
"1. Build a custom control panel. Need parts from either ‘Happ’, ‘Ultimarc’, or perhaps a local vendor like ‘Game Cabinets Inc.’. Gotta’ have the four player with at least one top fire joystick, a spinner, and a trackball. Oh, the fun we will have."
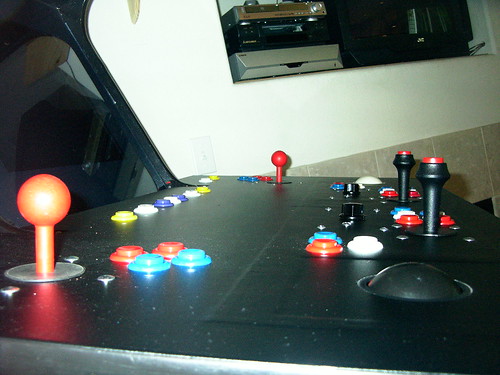
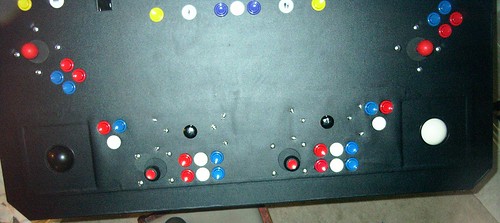
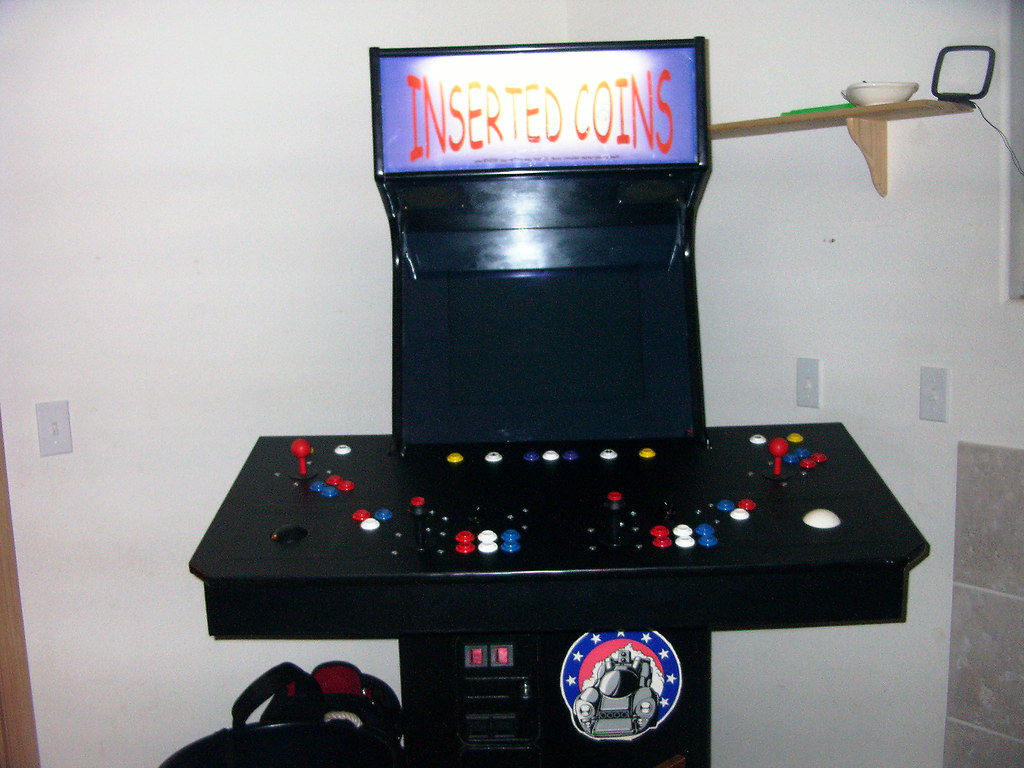
Done. Here are the pictures:
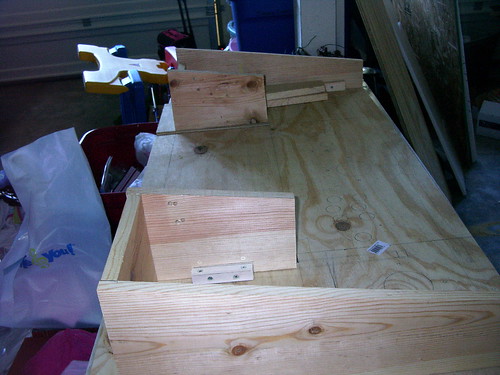
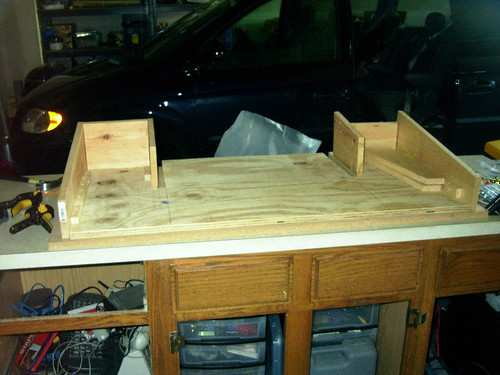
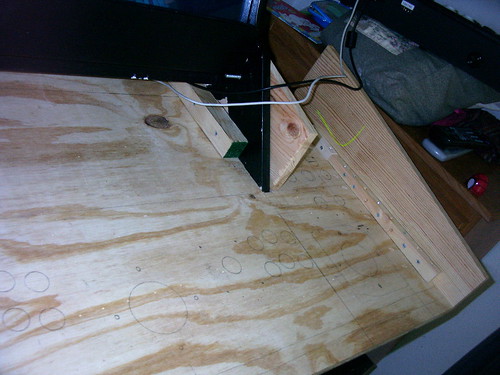
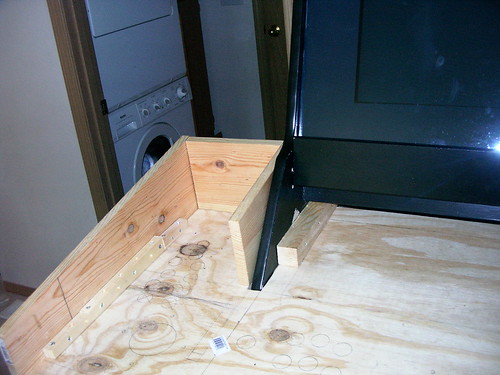
Big version of above picture - click here...
Big version of above picture - click here...
So, here are the 'guess-timations' of what I spent on this thing...
$40 Textured Black Vinyl Laminate 2' x 10' roll x2 purchased from 'partsexpress.com'.
$40 2' x 4'x 3/4" plywood 'handy-panel' x2
$40 for various wood pieces, 8' x 2" x 2" x1, 8' x 1" x 1", etc.
$80 for various mounting hardware, screws, bolts, etc.
$40 for 2+ trackballs, purchased from the physical location of 'coin-opgames.com' in Portland, Or.
$40 for 3 spinners, 'Tempest' spinner x1, 'Mad Planets' spinner x2 - didn't wind up using the 'Tempest' spinner, purchased from the physical location of 'coin-opgames.com' in Portland, Or.
$115 for 'IPAC-4' keyboard encoder and 'OPTI-PAC' optical encoder from private party on the forums at 'arcadecontrols.com'.
$80 for trackball mounting plates and buttons from the physical location of 'gamecabinetsinc.com' in Redmond, Wa.
$25 for various wires, connectors, wiring tools, etc.
Theoretical total:$500
Now, it's worth it to point out that I bought a lot of other things along the way. Some things I either didn't use or didn't fit the project in the end. Some things I bought can't be attributed ENTIRELY to the project so I didn't count them. Realistically though, this probably all adds up to another $200 to $300. This includes the tools I got from the pawn shop, (plunge router, drill, jigsaw, sander), unused parts, (Wico Command Control Trackball for Atari 2600, 'Tempest' spinner, Microsoft 'EasyBall', a zillion joystick parts), and...well, you get the picture.
That brings the total of the control panel build within the range of $500 to $800. WOW. Not too bad when it's spread out over six months but still a LOT of money.
Was it worth it? H-E-double hockey sticks, yeah.
Would I have been better off just buying a 'kit'? Maybe. I wouldn't have had to spend so much time trying to figure out how to 'do' basic carpentry. I probably would have wasted a lot less time. However, I wouldn't have the satisfaction of knowing that I did it myself.
Would I suggest that other people do it? Yes. In fact, I think most people are MUCH more likely to have more of a knack for the carpentry than for the electronics. Still, since the wiring and configuration is pretty basic, I think that it would be pretty straightforward for most people.
My kids like it...and that's really all I wanted in the first place. So, in the end, it's definitely a success. :)
THE END. They lived happily ever after...or at least until dinner time. MUHAHAHA!
Okay, move along now.
{DISMANTLED! See the goodbye post here...(disregard the date - 06/28/10 was the dismantle date)}
Part 1 - Part 2a - Part 2b - Part 2c - Part 2d - Part 3 - Dismantled - Random Statements Home
posted by L h a r l e s at 9:45 AM
![]()
0 Comments:
Post a Comment
<< Home