The M.A.M.E Cabinet - 'INSERTED COINS' - Part 2(c)
PART 2C:
EXTREME MAKEOVER: ‘I AM STUPID’ EDITION
EXTREME MAKEOVER: ‘I AM STUPID’ EDITION
Next, I proceeded to work on the peripheral stuff…the things that weren’t crucial to the function of the thing but would make the experience whole, ya’ know?
First, I went in search of ‘T-Molding’. A web search for this to locate it in my local area yielded a lot of information about flooring but very little about black plastic strips of stuff that you beat into crevices in plywood with a hammer. In the end, after asking a co-worker where I might find something of this type, I found ¾” Black Plastic T-Molding at a place called ‘Rockler Woodworking and Hardware’ which happened to have TWO locations within driving distance. I wound up getting 100’ of T-Molding for $27.99. Then I beat it til’ it got all wedged into the plywood and stuff. It was a nice tension release after all the frustration of removing the decals and adhesive…and I only hit my thumb about 412 times.
The ‘marquee’ light. I mentioned that I bought a light in a list. I attached that as close to the location of the original light as possible. Went in like a champ and there was plenty o’ power cable.
The speakers. I cannibalized a set of ‘Altec Lansing’ Series 100 speakers. Initially, when I set up the operating system and applications, the sound worked fine. Left and right were good, no problem. This turned out to be a huge pain. I’ll come back to this.
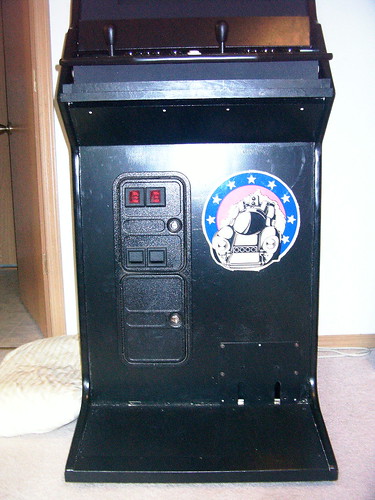
Reattaching the coin door. This was a bit of a challenge too. Turned out that while I had the coin door, coin box, wiring, coin drop mechanism, etc…the doors didn’t have locks. I wound up picking up coin door locks from a place called ‘Coin Op Games/Specialty Coin Products’. Since I’m using a pre-built control panel, I’m not hooking up the coin door to register coins yet. However, I have rigged it so that money just drops right into the coin box…never to RETURN!!! MUHAHAHA!
Reattaching the foot pedals. I originally thought that it would be fun to reattach the foot pedals and wire them up for ‘ESC’ or ‘TAB’ functions…or something like that. Turned out that I needed the space for the PC. So, I dismantled the pedal assembly and left the steel panel on the front to cover the hole there would be if the steel panel weren’t there.
Power. A trusty minimalistic, surge suppressor/power strip was used. Enough room for the speaker transformer, the ‘marquee’ light, the PC, and the monitor. Oh, yeah.
...back to the speakers. Turns out, when I reached the point of putting this thing together, (at least in the MAJOR sense), for the last time, that the right speaker wouldn’t work. I tried every possible thing I could at the time, (and I was getting pretty fed up with workin’ on this thing)…so I took an OLD set of ‘Packard Bell’ side-mounting monitor speakers and tried them – SAME problem. Eventually, I tore apart one of the ‘Packard Bell’ speakers, spliced some extra cable into it to extend the cable length, mounted it up in the area where the speakers were before, covered the interior of the speaker grill spaces with ‘fabric’, (read: pushpinned paper towels over the holes on the inside), and the sound was great with just the one speaker. So, I left it that way. I actually am currently holding the speaker in place with a half dozen screws bracketing the speaker and holding it down via fabric straps over the top. It’s very 16th century…except I don’t think they had Philips head magnetized screwdrivers…or screws with threads even. I guess without the threads they’re just nails, right?
The bezel – a.k.a. the square thing that covers the part of the screen that you DON’T see images on is cut from a big ol’ sheet of black posterboard. I just measured the dimensions of the viewing area of the screen and the monitor glass and then traced them onto the posterboard and then cut with a utility knife. It’s held in, in the super fancy way that would make any fifth grader proud…good ol’ clear adhesive tape. The bezel lead to an affliction called ‘monitor sharpie-ness’. Yes, it’s true. I had to color the areas directly around the viewable area of the monitor with a ‘sharpie’ permanent black ink pen in order to make it look normal. However, since I painted the whole damned thing black, chose black T-Molding, and put on a black bezel…it’s easy to lose track of where the edge of the screen is. : )
The FINAL marquee. The original plan was just to use the remaining ‘Rad Mobile’ marquee. I thought it would be okay. Then, as the process moved along, it became obvious that the thing wasn’t really in that good of shape. The thing was pretty beat up and needed some paint repair, if nothing else. Since I’d had enough painting…
I spent about 5 minutes on it in two or three basic art/word processing programs. I took the end result to ‘Ss-tap-lees’, had it printed out and only wound up having to pay $7.60 after taxes for a 23.6"x9.5" high-quality print out on glossy paper which I then sandwiched between two pieces o' plexiglass type stuff I had sittin' around from a former hobby of mine which required these monster maps which I would keep layin' flat by puttin' em' underneath huge pieces of plexiglass...er, stuff.
Continue on to the other parts o' the M.A.M.E. adventure...if you DARE!
Part 1 - Part 2a - Part 2b - Part 2d - Part 3 - Part 4 - Dismantled - Random Statements Home
posted by L h a r l e s at 10:15 AM
![]()
0 Comments:
Post a Comment
<< Home