The M.A.M.E. Cabinet - 'INSERTED COINS' - Part 2(a)
PART 2:
LET THE UNINFORMED AND ARCHITECTURALLY UNSOUND DESTRUCTION OF WOOD AND WOOD BASED PRODUCTS BEGIN.
LET THE UNINFORMED AND ARCHITECTURALLY UNSOUND DESTRUCTION OF WOOD AND WOOD BASED PRODUCTS BEGIN.
PART 2A:
MONITOR THIS, EH!
Anyway, at some point I got away from being concerned about cutting the ‘pointy part’ and began focusing on how I would mount a 22” CRT monitor in the space where the arcade monitor used to sit. Where I got the monitor and the other PC parts, I’ll address later on.
I proceeded to figure out how to get the monitor into this space and took the following steps:

Step Zero: Removed the back panel of the monitor and sawed it down two different times. Eventually, I figured out that this was not going to be effective. While the front of the monitor was well supported by a part of the cabinet frame already installed, the back tended to tilt down, (did I mention this thing is 3224852 pounds?).
[On a side note, CRT monitors are nasty lil' buggers when it comes to hurting you. You see, they hold a charge even after they've been unplugged a while. FORTUNATELY, I am not dead. Which sort of makes sense, since I'm typing this. Still, every time I had to get a hold of that thing to lug it back over to the cabinet, I felt like I should make a change to my life insurance.]
[On a side note, CRT monitors are nasty lil' buggers when it comes to hurting you. You see, they hold a charge even after they've been unplugged a while. FORTUNATELY, I am not dead. Which sort of makes sense, since I'm typing this. Still, every time I had to get a hold of that thing to lug it back over to the cabinet, I felt like I should make a change to my life insurance.]
2: Ran to Home DepAH-t. Purchased a Mitre Box/Saw kit for $7.49, a 1"x12"x4' piece of some sort of wood that was solid but not manufactured for $5.65, and an 8' long piece of 1"x4" MDF. MDF stands for, er, Manchurian Delight Frogsweat...or something like that.
{Forgot that I bought 3 1”x1”x2’ pieces of wood to build the ‘fence’ around the shelf…which I’ll discuss later. $1.29 each...or somethin' like that.}
III: Proceeded to try to cut the long 1"x12"x4' piece of wood with a hand saw that I already possessed. Actually, I cut it quite effectively. I was remarkably surprised. Considering all previous attempts at cutting something fairly straight resulted in something that looked like I had cut it while having a seizure, I was really pleased. I didn't use the Mitre thing cause' the board was too big. As fun as it would be to tell you that I was stupid enough to expect I would be able to use it, I just wasn't that dumb...at least not that way and not yet.
Quad: I managed to cut it to the proper length and it fit just fine. However, since the depth of the space was 14" and the depth of the piece of wood was 12"...there was a gap. SO...
FiVEr: I took an old piece of 2"x4" I had in the garage and cut some pieces off of it to fit at the gap at the back of the new shelf where there was a gap. Over the course of this time I had powerlifted the monitor approximately 432 times into the space it would eventually fill to figure all of this out.
S-ee-ehks: The thing fit. No gap. Now, it wouldn't stay in one place, it would still barely bind up against the back of the cabinet and then be off to one side or the other.
G: I cut more of the 2"x4" to place on the shelf under the monitor and along the sides to keep it static. Voy-LA! French Toast!
8: The monitor was in place. Now I just needed to plug it in again to determine if I'd broken it while throwing it around like a shotput.
So, as you read, I eventually made use of the two pieces of wood that I separated from the interior sides of the cabinet, where the ‘pointy’ parts were. These became the base for a shelf extension for the monitor to sit on.
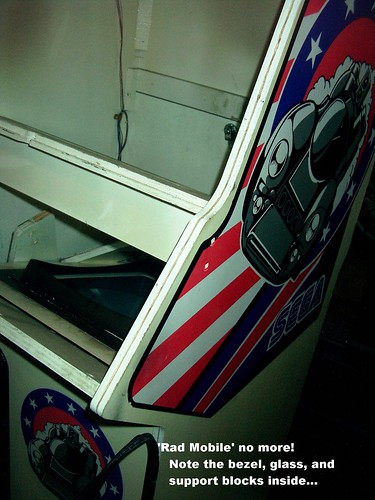
Now, I had a shelf to set the monitor on and an effective method to keep it in place. I did what any crazy person would do at that point and abandoned that part of the project, totally disregarding the bezel for the monitor, mounting the monitor glass, and so on.
Continue on to the other parts o' the M.A.M.E. adventure...if you DARE!
Part 1 - Part 2b - Part 2c - Part 2d - Part 3 - Part 4 - Dismantled - Random Statements Home
posted by L h a r l e s at 10:14 AM
![]()
0 Comments:
Post a Comment
<< Home